Register your project
A builder profile is the off-chain record that pairs your project's identity (name, logo, description, social links) with the wallets and contracts that represent it on-chain. You'll create the profile first, then prove ownership of each contract, then activate on-chain in a single transaction.
Step 1. Connect your admin wallet
Open the Builders Portal, click
Connect, and sign with the wallet you intend to use as the project's
admin. Pick a wallet you mean to keep; admin changes go on-chain.
On first sign-in, a Welcome dialog explains the Builder Score; click
Get Started to dismiss it. You can reopen it from the score info
link in the Contracts panel.
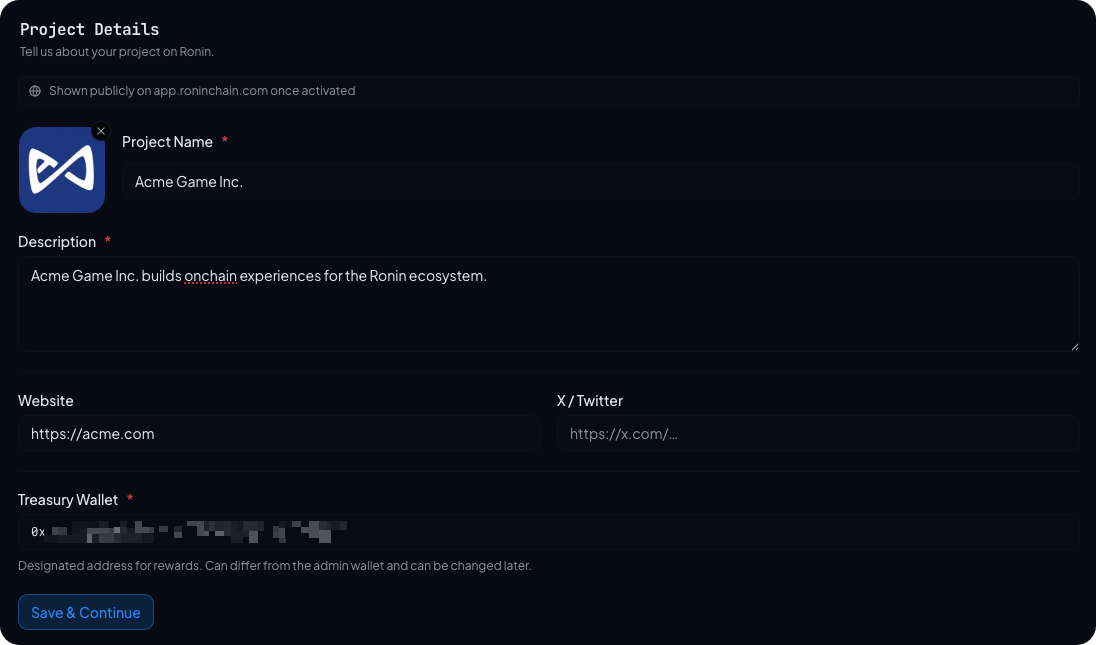
Step 2. Fill in project details
The dashboard opens on the Info tab. Fill in:
- Project name. What your project is publicly known as. Shown on
app.roninchain.comonce you activate. - Logo. Upload a square image (PNG, JPG, or SVG, up to 1 MB).
- Description. One or two sentences. Avoid marketing copy; this is read alongside other builders.
- Website. Your project's primary URL.
- X (Twitter) URL. Optional but recommended.
- Treasury wallet. The wallet that will receive your PoD rewards. This can be the same as the admin wallet, but it usually shouldn't be: a hot admin wallet that signs frequently is a worse fit for holding rewards than a cold or multisig treasury. You can change this later.
Click Save & Continue. The form saves to the off-chain profile only; no
transaction is required at this stage.
Step 3. Add your smart contracts
Save & Continue lands you on the Contracts tab. Click Add Contract
and paste a deployed contract address. The portal confirms the address
is a deployed contract, reads its deployer (the EOA that sent the
creation transaction), and detects optional Owner, AccessControl
roles, and Gnosis Safe owners.
Each contract you add appears in the list with its detected type
(Ownable, Access Control, MultiSig, or Unknown), its deployer
address, and a pending status. Repeat for every contract you want
to count toward your Builder Score. Only on-chain activity from
contracts you add will be scored.
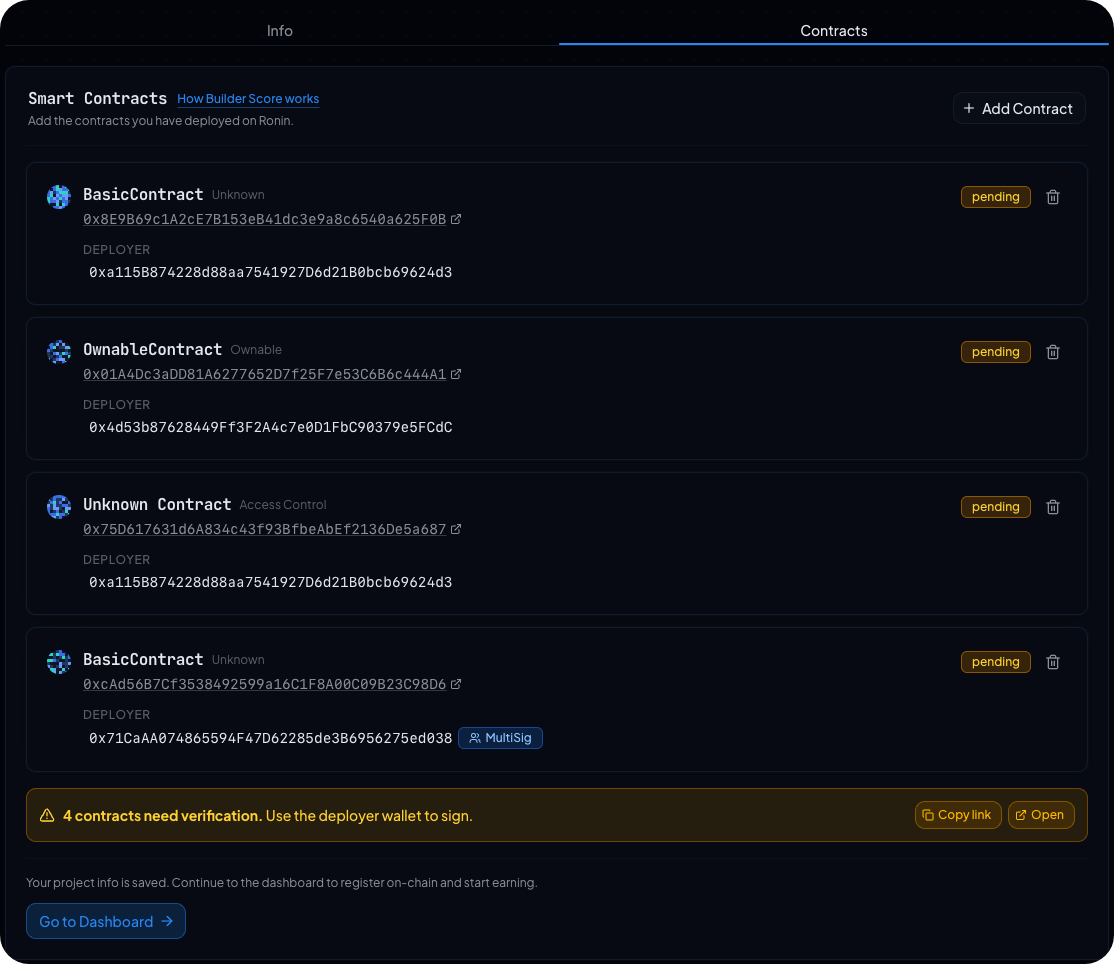
The banner at the bottom of the list provides a Copy link and Open
shortcut to the verify page. You can continue to the dashboard whenever
you like; verification status updates from there as each contract is
signed for. See Verify contract ownership for the next step.
Step 4. Share the verification link (optional)
If the deployer key, owner, or role lives in a different wallet than the one you're signed in with, copy the verification link at the bottom of the Contracts tab and send it to whoever holds the key. The link is scoped to your profile and only authorizes verification submissions.
What's next
You can activate on-chain whenever you're ready. You don't have to wait until every contract is verified before activating; you can keep adding and verifying contracts from the dashboard after activation.